1. Main Tab

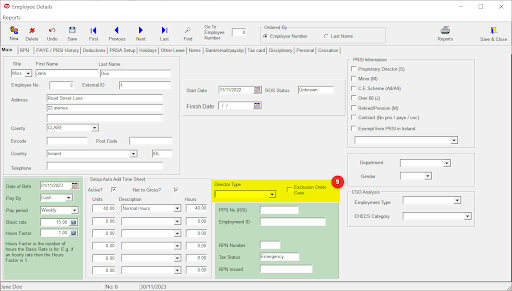
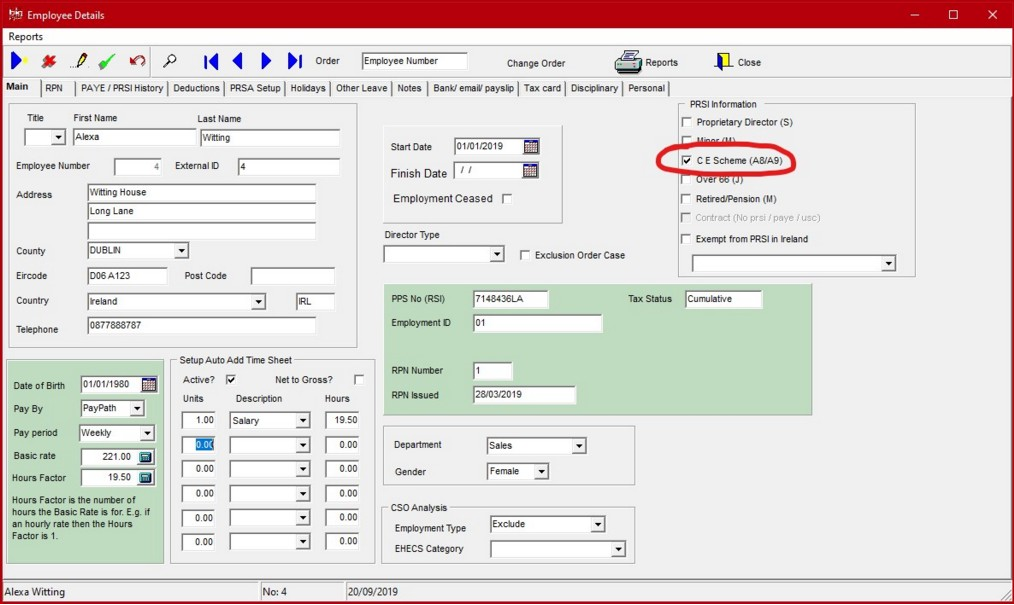
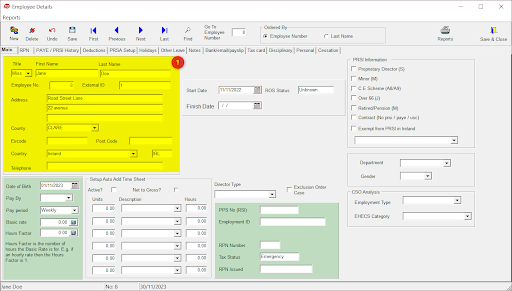
  1. In the highlighted box, you will have the main details shown for that employee.

Name, Employee number, External I.D, the external I.D can be used for third party time management software also by Revenue if there is no PPSN present, Address and telephone number.


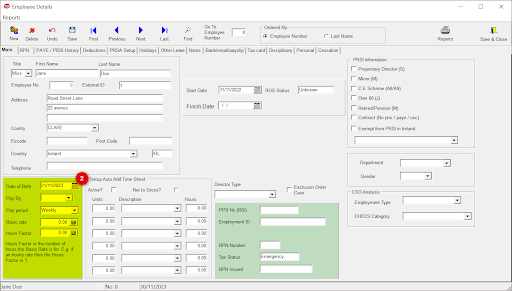
  1. In this highlighted section you can add employees date of birth, set the ‘Pay By’ method, by choosing an option in the drop down menu.

Set the ‘Pay Period’, weekly, monthly or fortnightly and Input the ‘Basic rate’ and ‘Hours Factor’ for that employee.

Basic Rate is the employee’s basic rate of pay and should reflect how they are paid.

If an employee is paid hourly, the hourly rate is put into the basic rate box and hours factor is 1.

If the employee is on a salary, basic rate for example would be €600 and 40 hours in the hours factor box.

Hours Factor is the number of hours the basic rate applies to. This is important to enable the calculation of ‘Hours Worked’ for CSO returns and 8% rule for holiday entitlements.


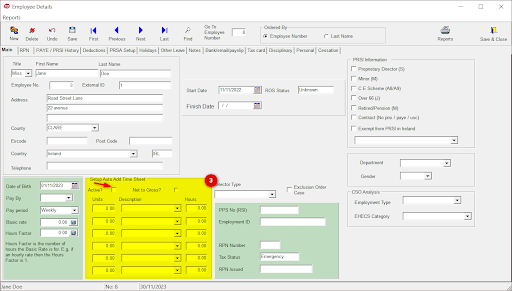
  1. When setting up Auto Add Time Sheets the ‘Active’ box needs to be ticked here in this section. This will automatically pull through the pay information to the timesheets. The employee could be setup for 37.5 Normal hours, €30 in expenses and 3 hours Overtime. Ticking the ‘Active‘ button means we can automatically add these pay details to a timesheet for this employee.

The ‘Net to Gross’ feature can be used however the taxable elements of each rate of pay must be the same.


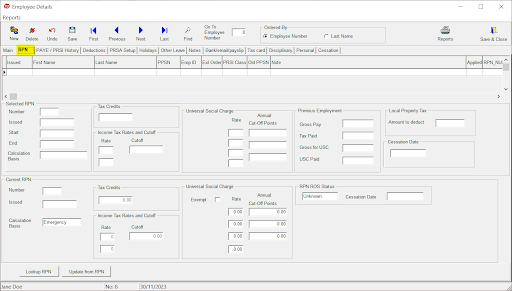
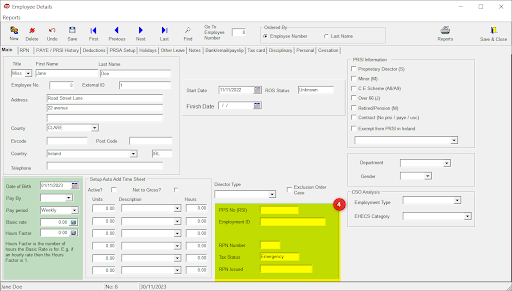
  1. The box highlighted is Employee information taken from the RPN (Revenue Payroll Notification) issued by ROS. The employees PPSN (Personal Public Service Number) is input here, if the employee is commencing work for the first time and they need a PPSN they can apply for one online or in person from DSP. The Employee I.D is set by the employer. The RPN number is used in conjunction with the Employees PPSN to uniquely identify the instruction issued.

The tax status is also set by ROS through the RPN eg: Emergency tax, Week 1/month 1 basis or Cumulative.


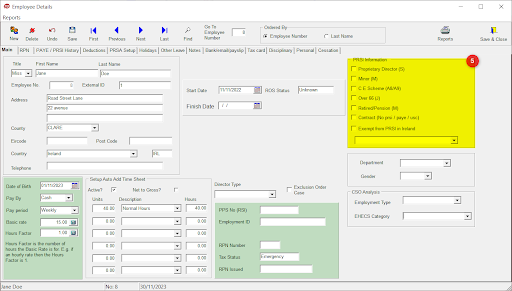
  1. PRSI INFORMATION: Is set by the DSP (Department of Social Welfare), this will appear on the RPN only where DSP carries out a review and determines when an individual should be exempt from paying PRSI in Ireland. Depending on the Employee in the system, this can be changed by ticking the relevant box. Eg: Class S (Proprietary Director) or Class M (minor) where applicable.


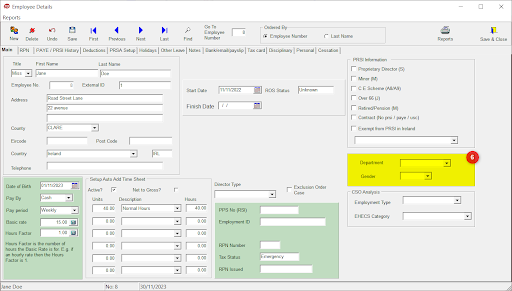
  1. If you have employees in different departments that can be set here, and also the persons gender if the information is required.


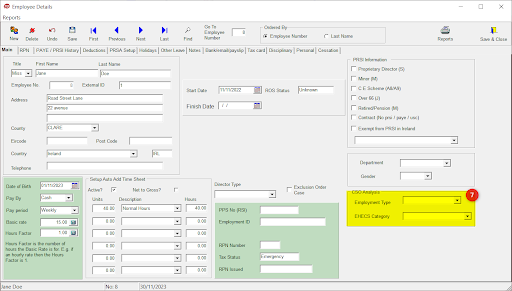
  1. CSO Analysis should also be updated. If you are selected to complete the Earnings, Hours and Employment Costs Survey (EHECS) for the CSO having this data entered correctly makes it much easier to extract accurate data from your payroll. You can set the Employment type for your employee eg Full-time, Part-time, Apprentice, Other, Exclude.

EHECS Category gives a drop down menu of Manager/Professional, Clerical/Sales/Service, Production/Transport/Manual you can choose a category that suits your employee.

These categories are set by the CSO.


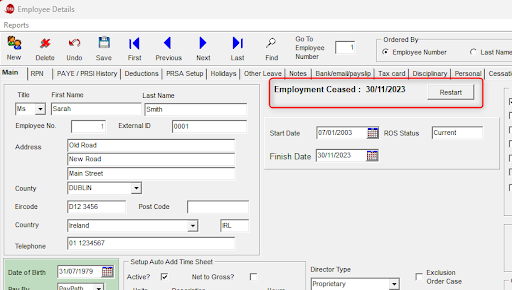
  1. When setting up a new employee, their Start Date should be entered.

ROS Status – Shows the Employment Status based on the latest RPN. ‘Current’ when the Employment is active on ROS and ‘Ceased’ when a ceased date has been notified to ROS and included in the latest RPN. ‘Unknown’ will show when an employee is on the system but ROS has not yet been notified of their employment.


  1. Choosing a Director Type from the drop down menu will give you 2 options Proprietary and Non-Proprietary, if either apply to your employee it can be set here.

2. RPN Tab

An RPN contains information for an employee in relation to the calculation and deduction of tax for the year in which the payments are made and is valid only for that year.  

The RPN tab in the Employee Details screen includes all the information retrieved from RPNs for the Employee selected. It includes details of the current RPN as well as any previous RPNs retrieved for your current financial year. Before processing Payroll, an RPN Lookup should be run to ensure the latest RPNs are retrieved for employees. 

The latest RPN must always be used. The only exception allowed is when the submitting of a payslip will cause an employee hardship, perhaps when a new RPN will cause an employee to pay a large amount in deductions and end up with less take home pay.

In this case, Revenue should be contacted to request a Week1/Month1 Tax Basis RPN. If they cannot be contacted, i.e. when it’s outside office hours, it is possible to change the tax status in the RPN tab in Employee Details by using the ‘Set Tax Basis to Week One’ button. This will change the calculation basis to Week One for the employee. Revenue must then be contacted at the next opportunity to inform them of the change made and request the updated RPN.


The RPN tab also includes the buttons to ‘Lookup RPN’ for the particular employee and ‘Update from RPN’ which can refresh the Current RPN details.

3. Ceasing an Employee

When an Employee has finished their employment with your company. It is necessary to Cease their employment record and notify Revenue of this Cessation. Revenue must be made aware of the employee’s finish date.

The first step in ceasing an employee would be to open the Employee Tab in your Payroll, then find the Employee in question. 

Click on the cessation tab (Step 1) at the top right of the window and click the ‘Cease Employment’ button (Step 2) before finally entering the Employee’s finish date below (Step 3) and then clicking the Notify Revenue of Cessation button underneath (Step 4) as shown in the image below.


Restarting a ceased Employee.

If a previously ceased Employee is returning to work for the company, then the best way to re-instate their employment is to go to the Employee tab and navigate to the Employee you wish to Restart.

You will notice there is a message on the main tab on ceased employee records that states the date when the Employee was ceased along with a button called ‘Restart’.

You want to press this Restart button and then as below you will be prompted to “Create a new employment?” Click Yes on this dialog box shown below and then click Yes again on the second dialog box to appear mentioning the Employees name. This will create a new record for this employee. Note that the old record will remain, and it’s advised to keep this record on payroll and not delete it.


Inputting payments after an Employee has been Ceased.

Making Payments to a ceased employee is very similar to the method you use to pay an active Employee. You first want to Go to the Timesheet section, enter the date for the payment and then as shown below you want to click ‘Select’ and then choose Ceased from the two options available to you.

You would then enter the hours related to the payment before proceeding to the Process tab.

In the Process section, you would process the payment as normal before finally going to the Submit Section to submit the payment to your Ceased Employee.

Should you require to pay the employee a further payment, outside the CE scheme, you must set them up under a second Employment ID in order to correctly calculate USC and PRSI.

The employee will need to access their Revenue MyAccount in order to assign credits to both of these Employment IDs. Details of how to do this can be found on the Revenue website.

Other Payroll Support Topics

ERR Reporting

support-tick

Getting Started

emp-details

Employee Details Screen

support-cash

Payroll Processing

support-other

Employee Leaving

emp-cso

CSO EHECS Return

backup

Backups, Utilities & Support

misc

Miscellaneous